The sump pump project is completed! Yay! (Click here to read what a sump pump is and where you need them.)
Background: we have two separate sump pumps in our basement. One is for ground water and one is for water in our house (laundry, AC, etc.). The first one pumps the water outside near the pond, and the second one pumps the water in to our septic tank.
We had new sump pumps installed two years ago when we moved in. We have an alarm system in our sump pits that goes off if the water rises higher than it should, to let us know the pumps are failing. And we have a generator to keep the pumps going when the power is out, so it’s a secure system! (Last year, our power was out for almost twelve hours during a storm where we got five inches of rain! The generator kept the sump pump going, and our basement dry.)
We decided to make the set-up SECURER, by installing another sump pump (same model) in the pit, as back up. So, if the first one fails, the second one works.
We also decided to put covers over the sump pits, because: it looks nicer, it mutes some of the noise, and keeps some of the radon in the ground out of the air in our basement.
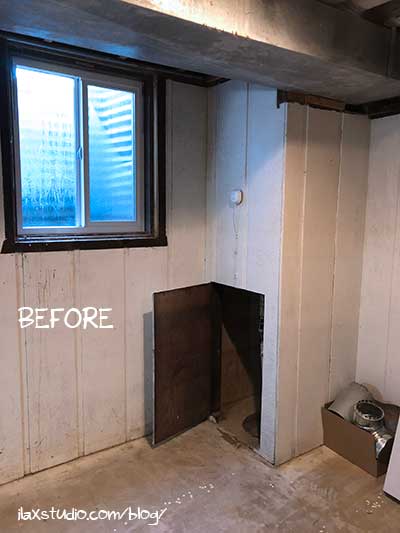
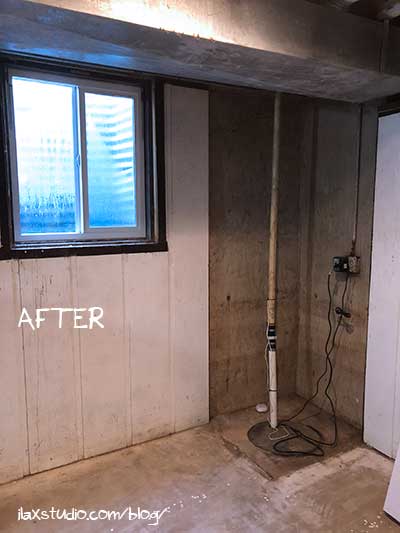
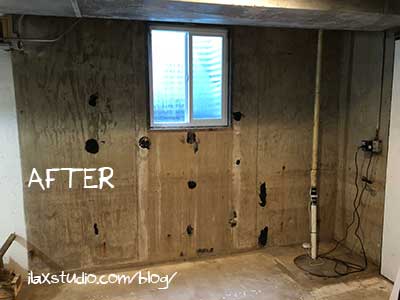
We began the project by demolishing the build-out around the sump pump that pumps ground water outside. We needed to demolish it to be able to get to it to work on it.
Then we started working on installing the back-up pump and cover on the other sump pit, which was more complicated because things in the basement drain in to it (air conditioner, water filter, floor drain, washer, sink, and dehumidifier).
We cleaned all the water out of the pit, and cleaned the floor around it, to prepare the lid to be glued on.
A lot of the project was staging the two pumps (one new, one old) in the pits, and staging the PVC pipe coming out of them. Because we added an extra pump, there’s now an extra pipe. The pipes have to join because they exit the house in the same spot. And they also have to have a check valve that keeps water from running back down the pipes in to the pit.
So, we’d stage it all up, drill the holes for the pipes to go through in the cover, stage it again, then glue the cover down and screw it in to the ground. Then we’d put grommets on the holes in the cover, get the pipes through (involving sanding them down, olive oil, and elbow grease), then do more staging to build the pipes up the wall.
Getting the first pit “set up” took about six hours three Sundays ago. Then Steven spent time during the weeknights finishing up the other connections in the lid, and screwing the cap on to the lid.
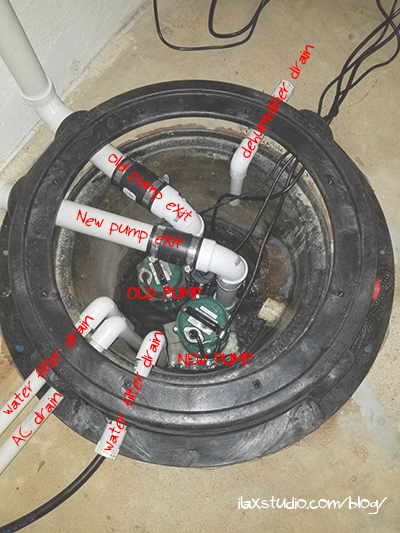
Here is what it looks like without the cap on it yet
We worked on the second pit two Sundays ago. It didn’t take quite as long because it has less connections going in to it. But it did fill up as we were working on it, because you can’t turn off the water going in to that pit like you can with the other one!
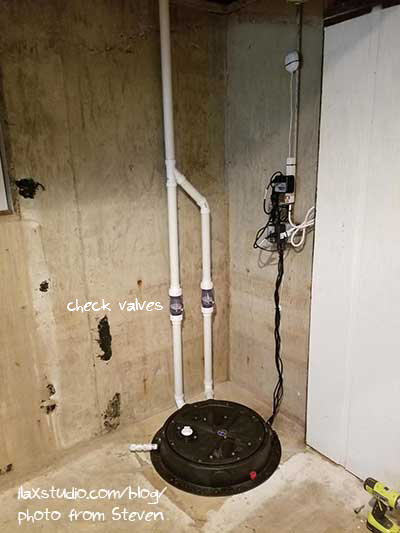
Ground water sump pit completed, with lid on the cover, and extension coming out for future connection. This is the area from the before picture above.
Then Steven finished installing the cap on the lid two Mondays ago, then installed traps on the AC and water filter pipes last Saturday. The traps keep any smells or gases from coming up out of the drain lines in to our house systems.
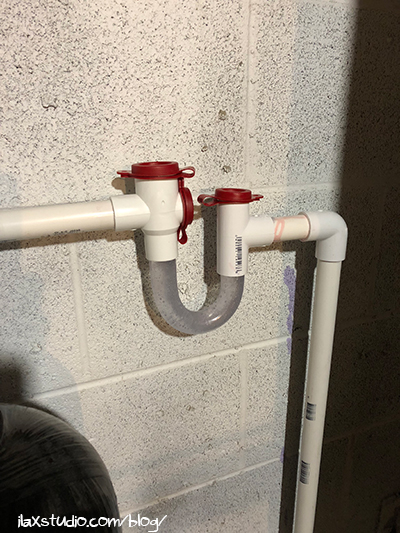
Water filter line trap
I’m glad we had a break in the rain while we were working on the ground water sump pumps! The hardest part of this was probably getting the pipes through the grommets once they were in the covers. We both had to push on them to get them through! And then there was the mischievous pipe cutter that sometimes liked to cut or gouge things at an angle… I think that’s getting returned!

